Managed Server Installation
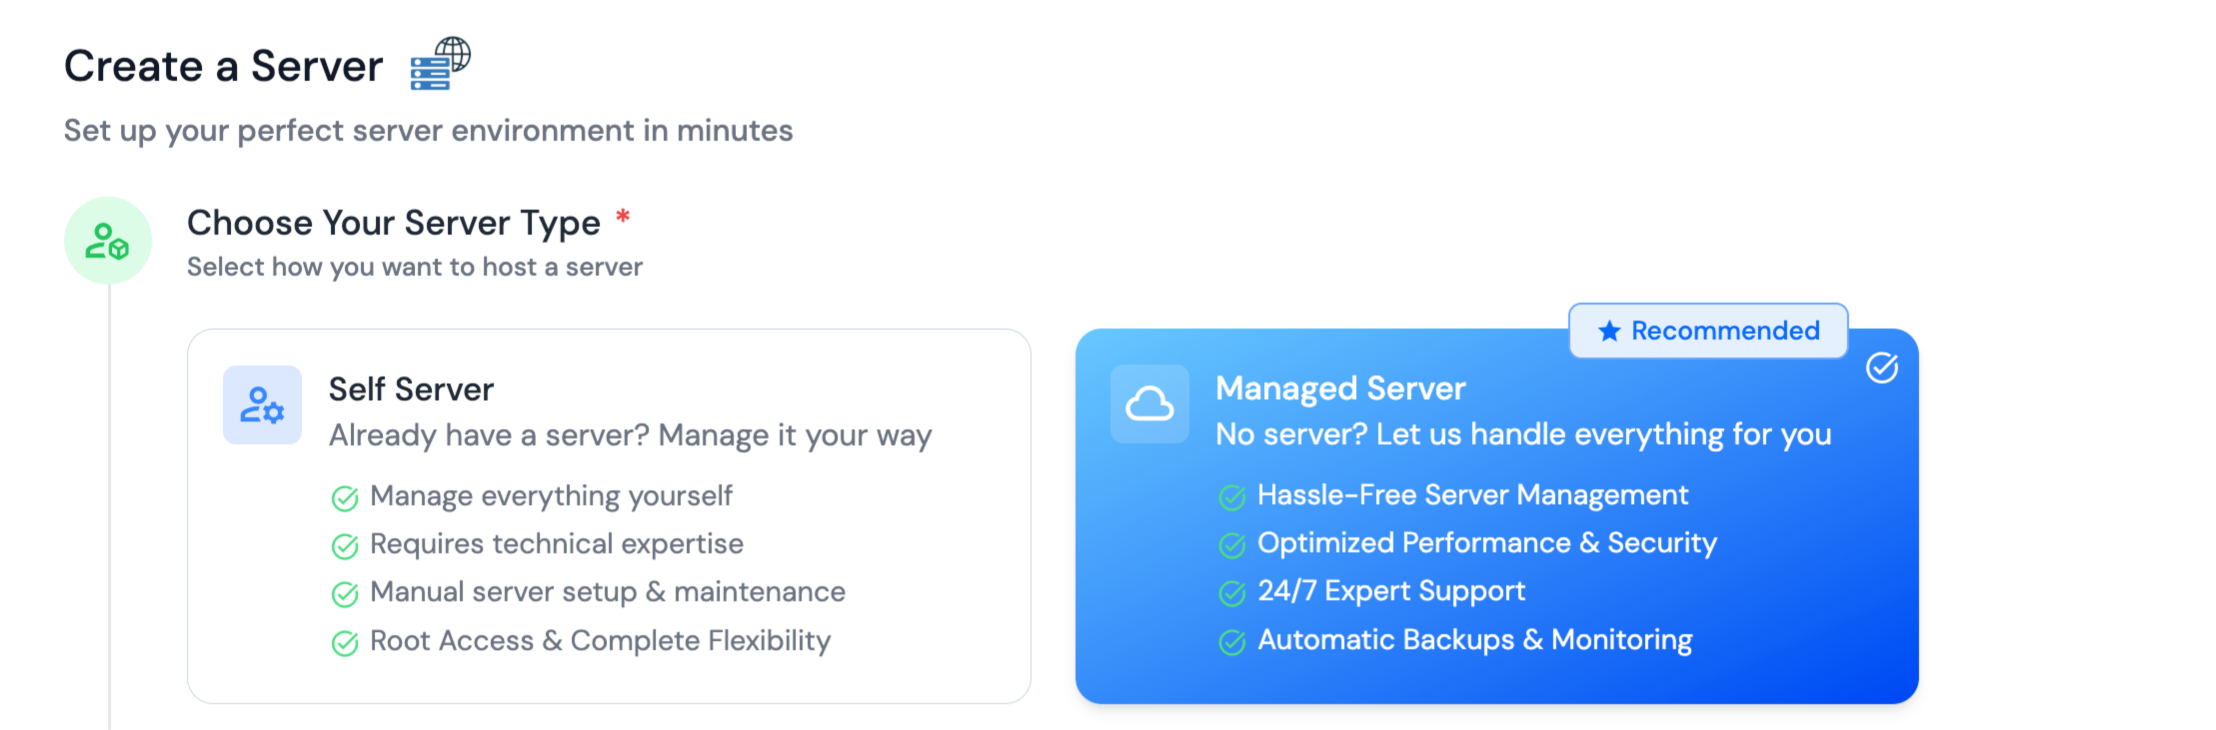
When creating a new server in ServerAvatar, you can choose between two types:
- Self Server – For users who already have their own server and want full control over server configuration and management.
- Managed Server – Ideal for users who prefer a hassle-free experience. The server is provisioned and managed under ServerAvatar's infrastructure, so users don’t need to worry about setting up or linking their own cloud provider accounts.
What Is a Managed Server?
A Managed Server is a ready-to-use server provisioned and maintained by ServerAvatar. You don’t need to connect your own cloud provider or manually configure the server. Everything—from setup to management—is handled for you.
Currently supported providers:
- DigitalOcean
- Vultr
ServerAvatar provisions and manages these servers on your behalf.
Step-by-Step: Create a Managed Server
Step 1: Log in to your ServerAvatar Dashboard and click the Create → Server button.

Step 2: Select Managed Server as your server type.
Step 3: Choose a Cloud Provider (either DigitalOcean or Vultr).
You don’t need to link your own cloud provider account—ServerAvatar handles provisioning internally.

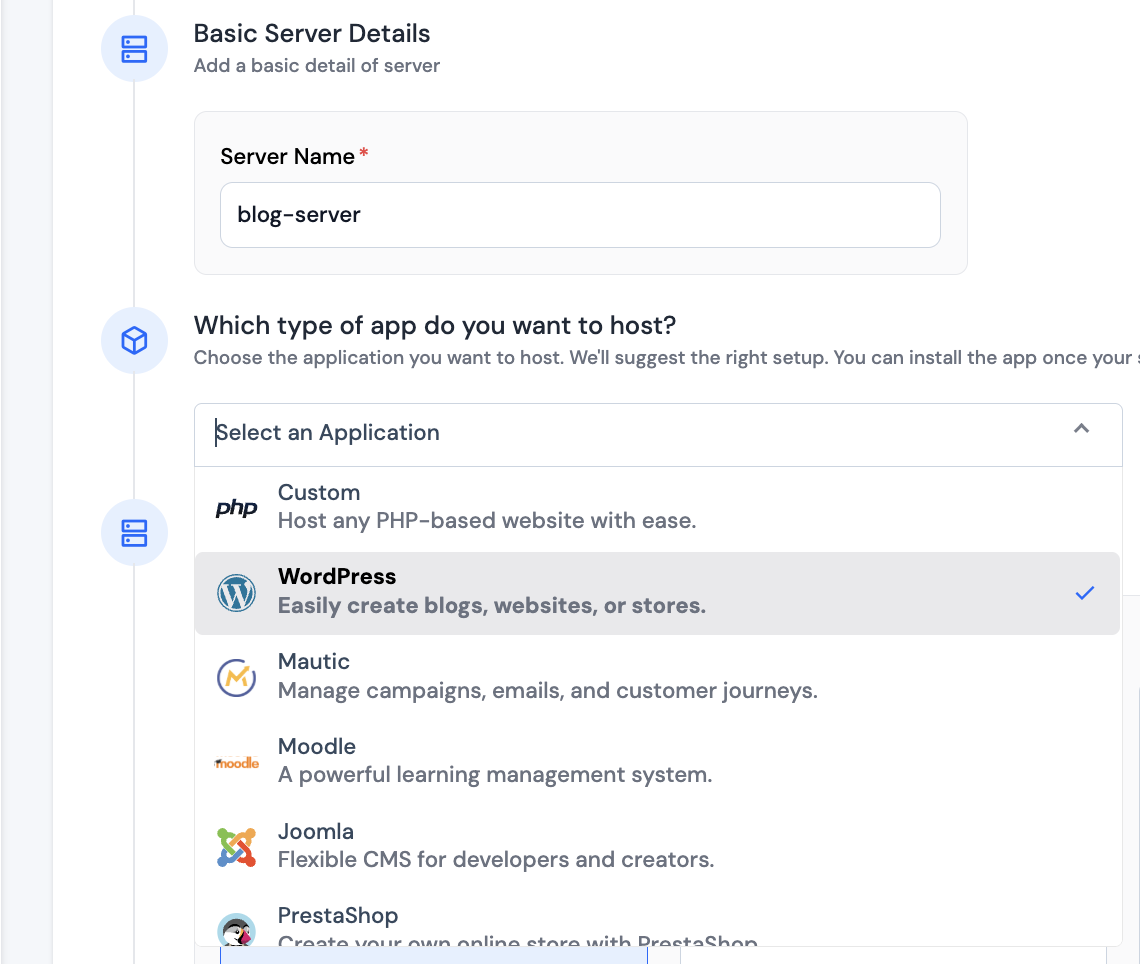
Step 4: Enter a Server Name to identify the server within your dashboard.
Step 5: Optionally, select the Application Framework you plan to use (e.g., WordPress, N8N, etc.). This helps suggest the ideal configuration.
Step 6: Choose the Tech Stack, Operating System, and Database as per your project needs.
Selecting the Node Stack disables MySQL/MariaDB options, as they aren’t supported in that stack.
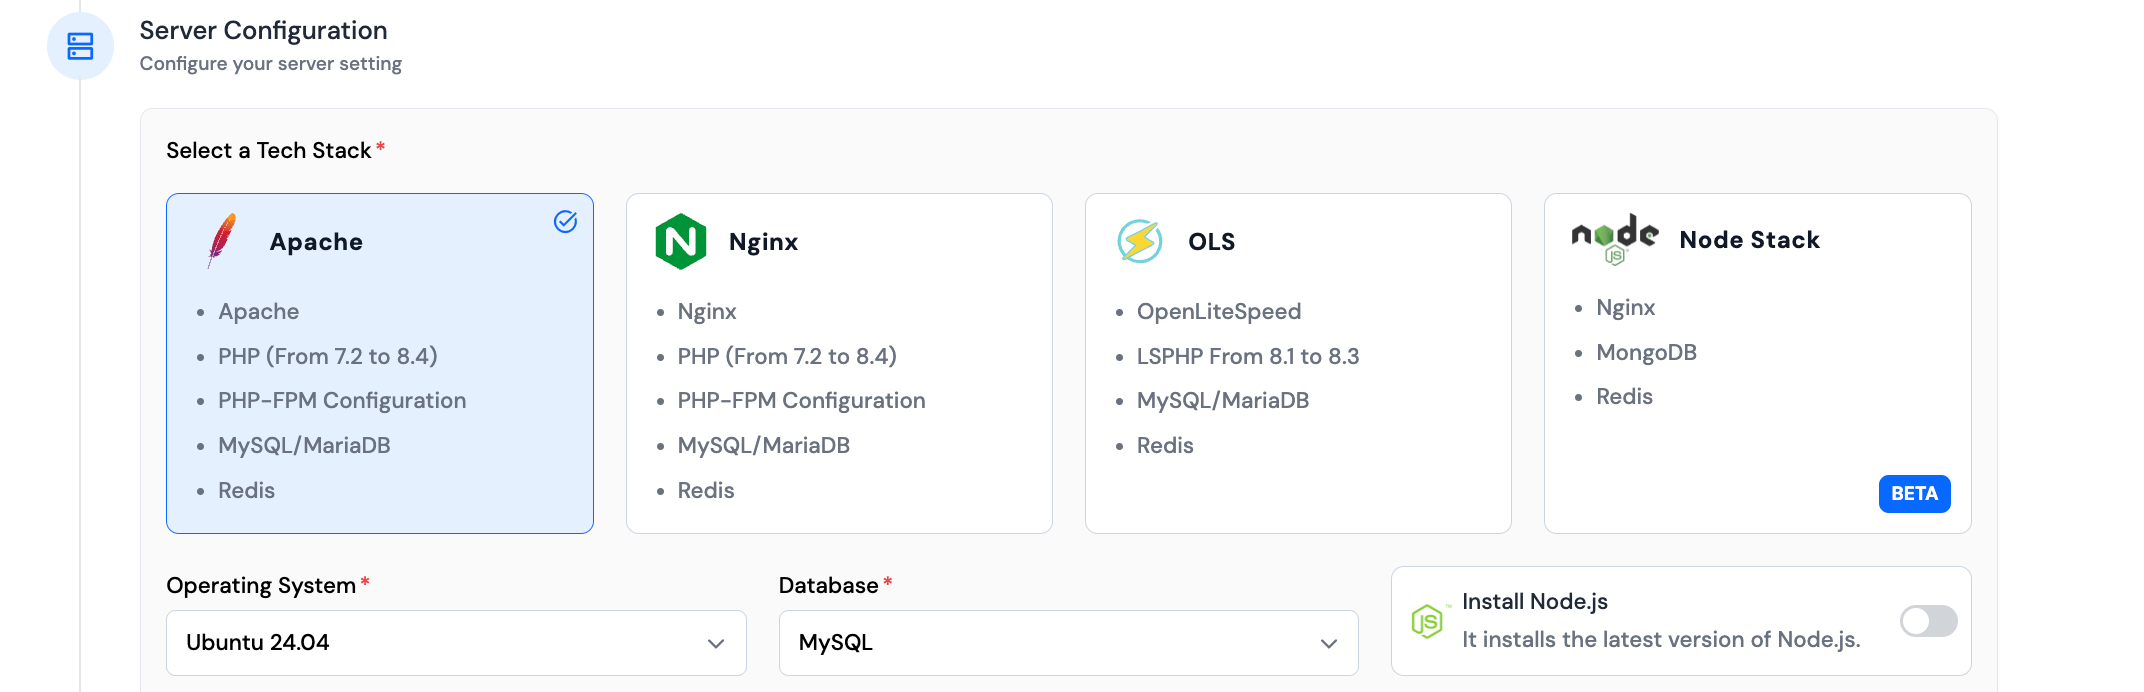
You can also enable installation of Node.js or Yarn by toggling the respective options.

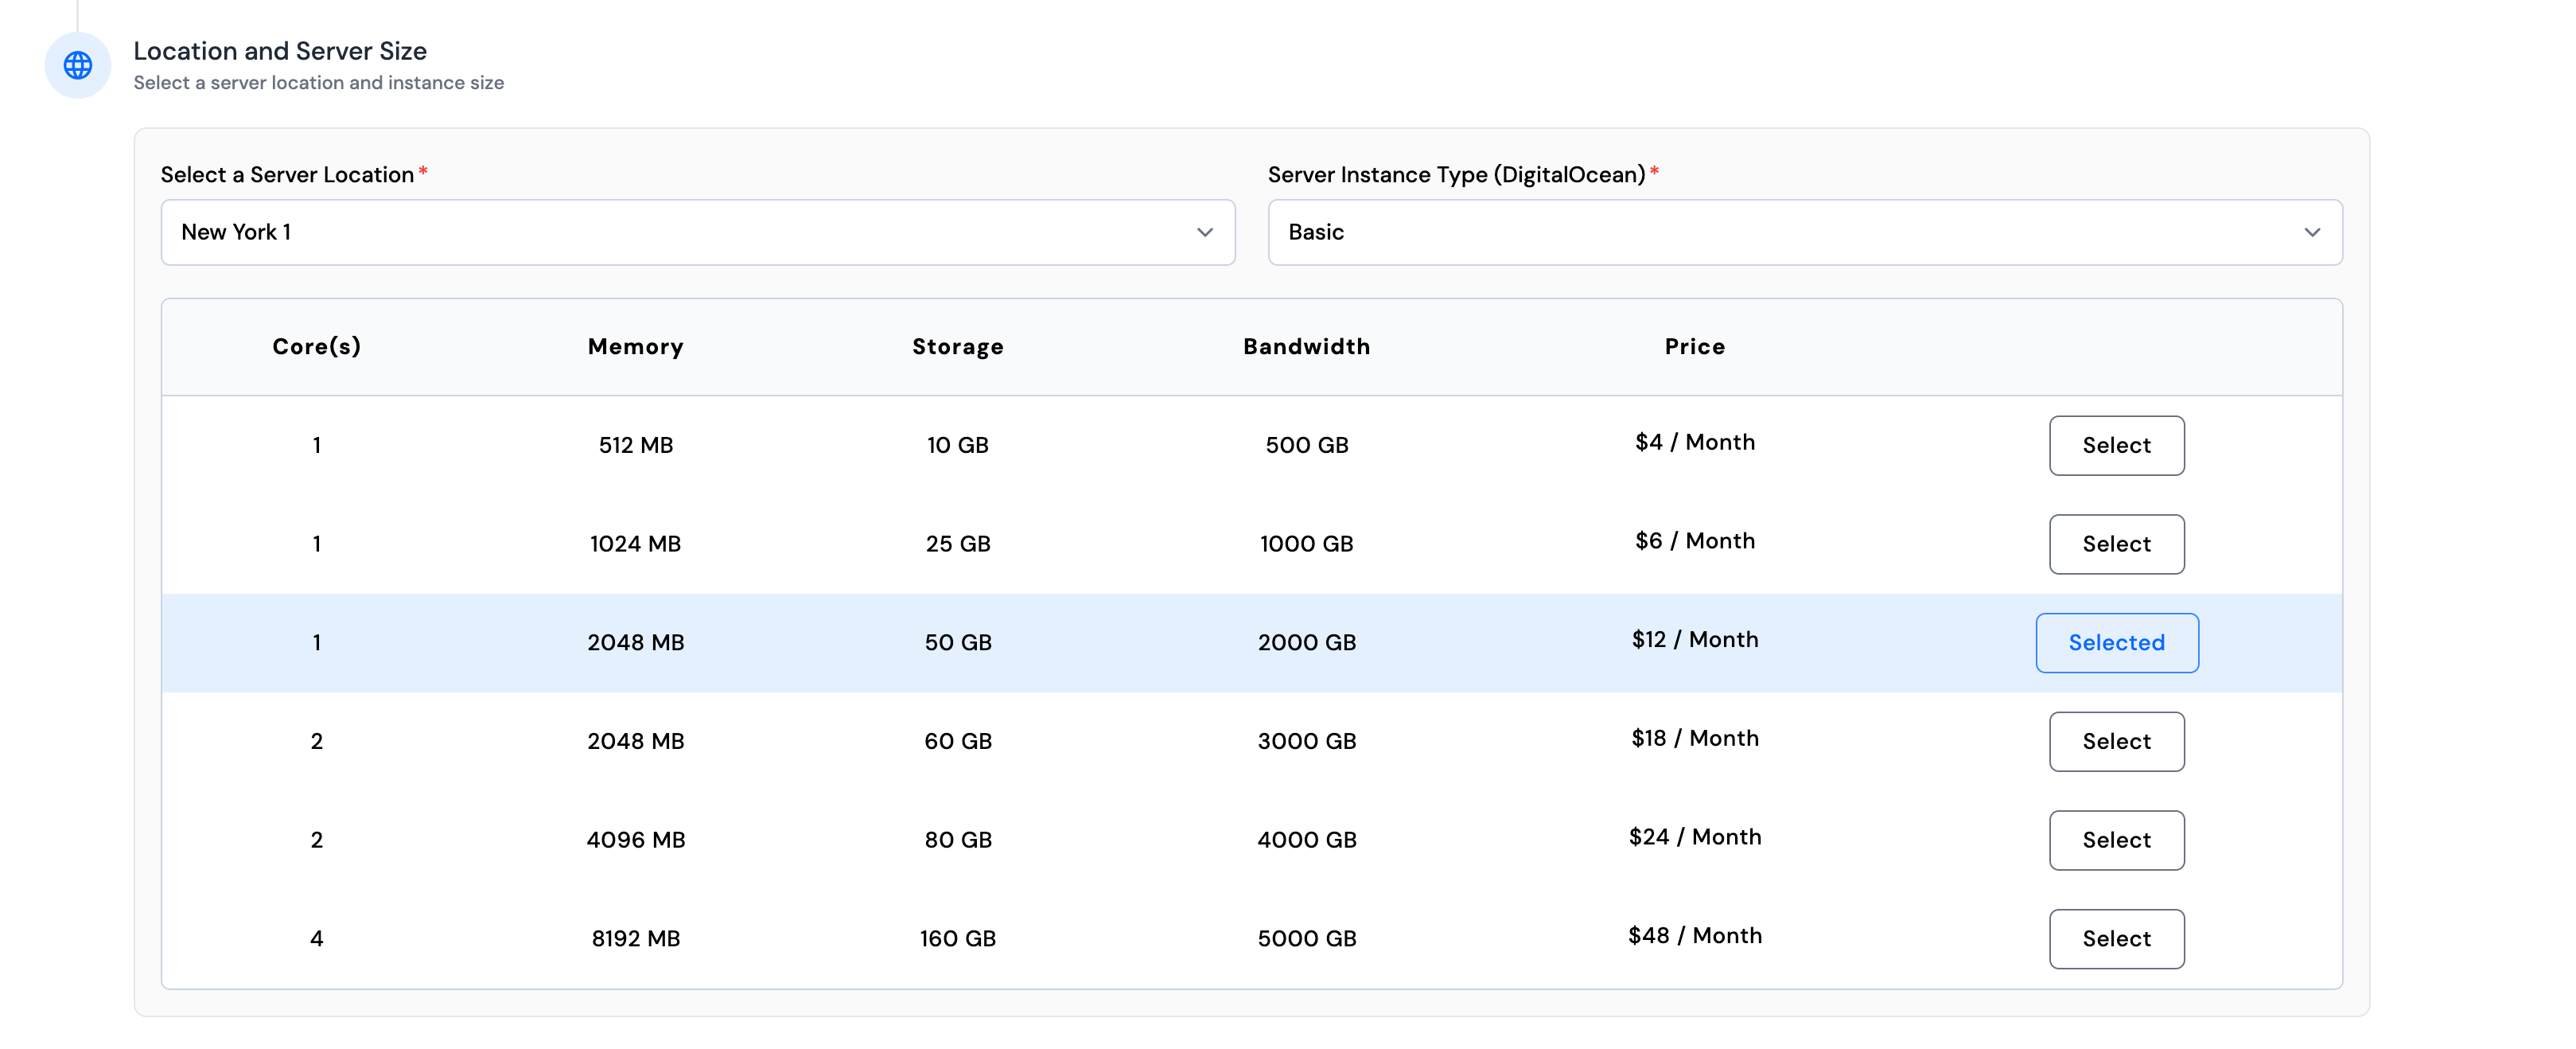
Step 7: Pick a Server Location and Size. These define the region (data center) and the computing power of your server.
Step 8: Click Deploy Server. ServerAvatar will create and configure the server for you.
Installation Process
During installation, you will see which services are being installed and configured in real-time. ServerAvatar will perform the following steps:
- Install a web server (Apache, Nginx, or OpenLiteSpeed)
- Install PHP and all supported versions (from 7.2 to 8.3)
- Install and configure PHP-FPM
- Install and configure MySQL
- Install and configure Redis
- Create a SWAP memory file
- Create basic virtual host files
- Install Git and Composer
- Finalize the setup and perform testing
This process usually takes 5–15 minutes. After that, your server is ready for deploying websites and applications directly from the ServerAvatar panel.
Resizing Your Managed Server
After installation, you can Resize your Server anytime from the ServerAvatar dashboard if your application needs more CPU, RAM, or storage. This ensures your server can grow with your project requirements without needing to reconfigure everything manually.