Resize Managed Server
ServerAvatar allows you to resize your managed server after installation to match your evolving performance needs. You can increase the CPU, RAM, and optionally the disk size depending on the provider and type of resize.
Resizing via ServerAvatar is available only for managed servers. If you are using a self server, you must resize it manually from your cloud provider’s dashboard.
Depending on your provider (DigitalOcean or Vultr), steps may vary.
First, log in to your ServerAvatar account.
Click on the Managed Server Dashboard button.

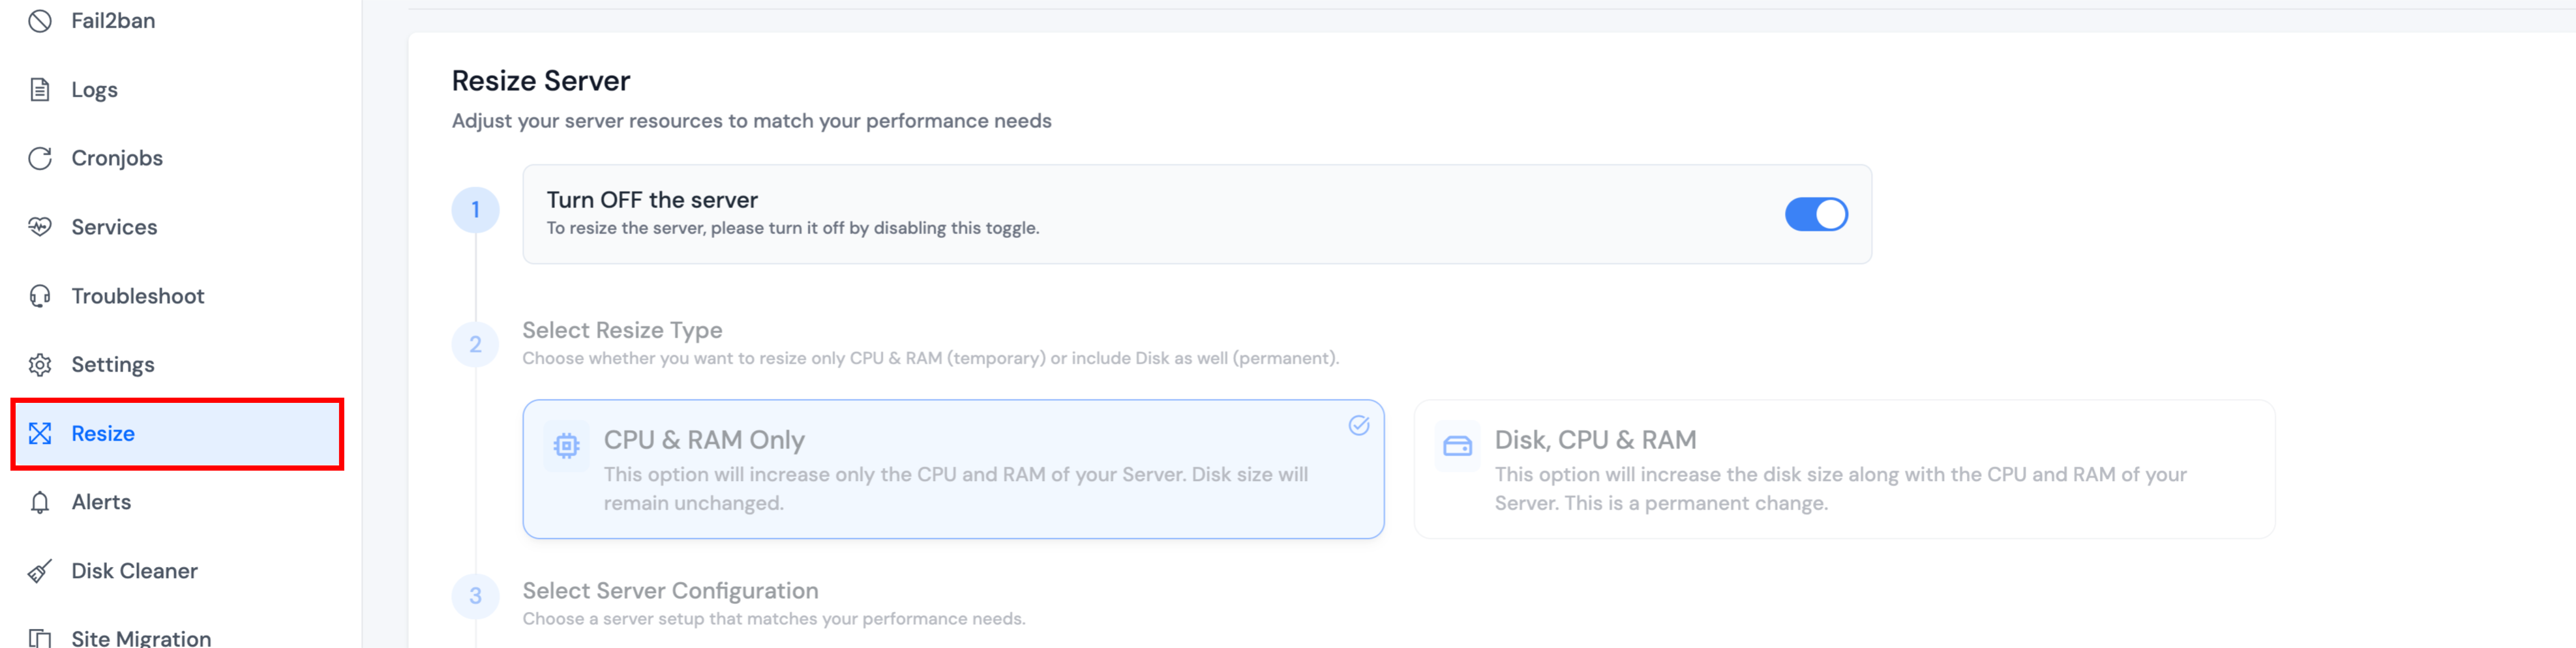
Now, you will see the Resize option on the left-hand sidebar of the Server Panel. Click on "Resize" to access the resizing interface.
Resizing DigitalOcean Server
If your server is provisioned via DigitalOcean, follow these steps:
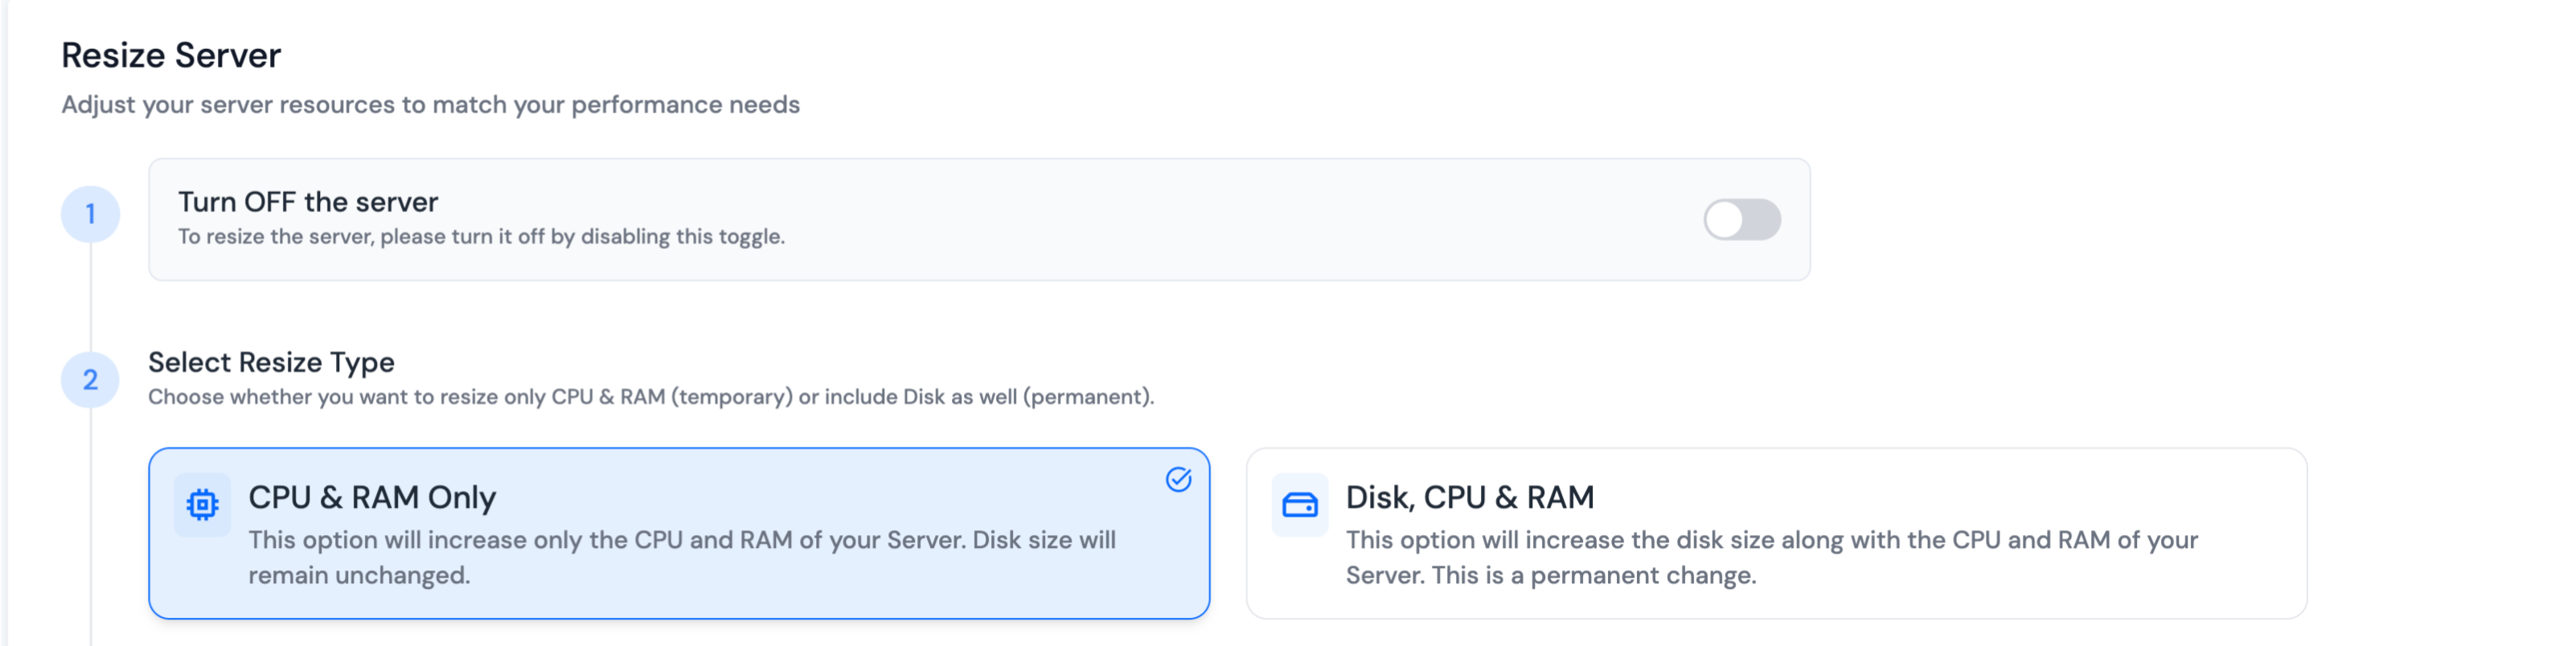
1. Turn Off the Server
Before you can resize, turn off the server using the toggle switch on the resize screen.

2. Select Resize Type
Choose one of the following:
- CPU & RAM Only – This option will increase only the CPU and RAM of your Server. Disk size will remain unchanged.
- Disk, CPU & RAM – This option will increase the disk size along with the CPU and RAM of your Server. This is a permanent change.
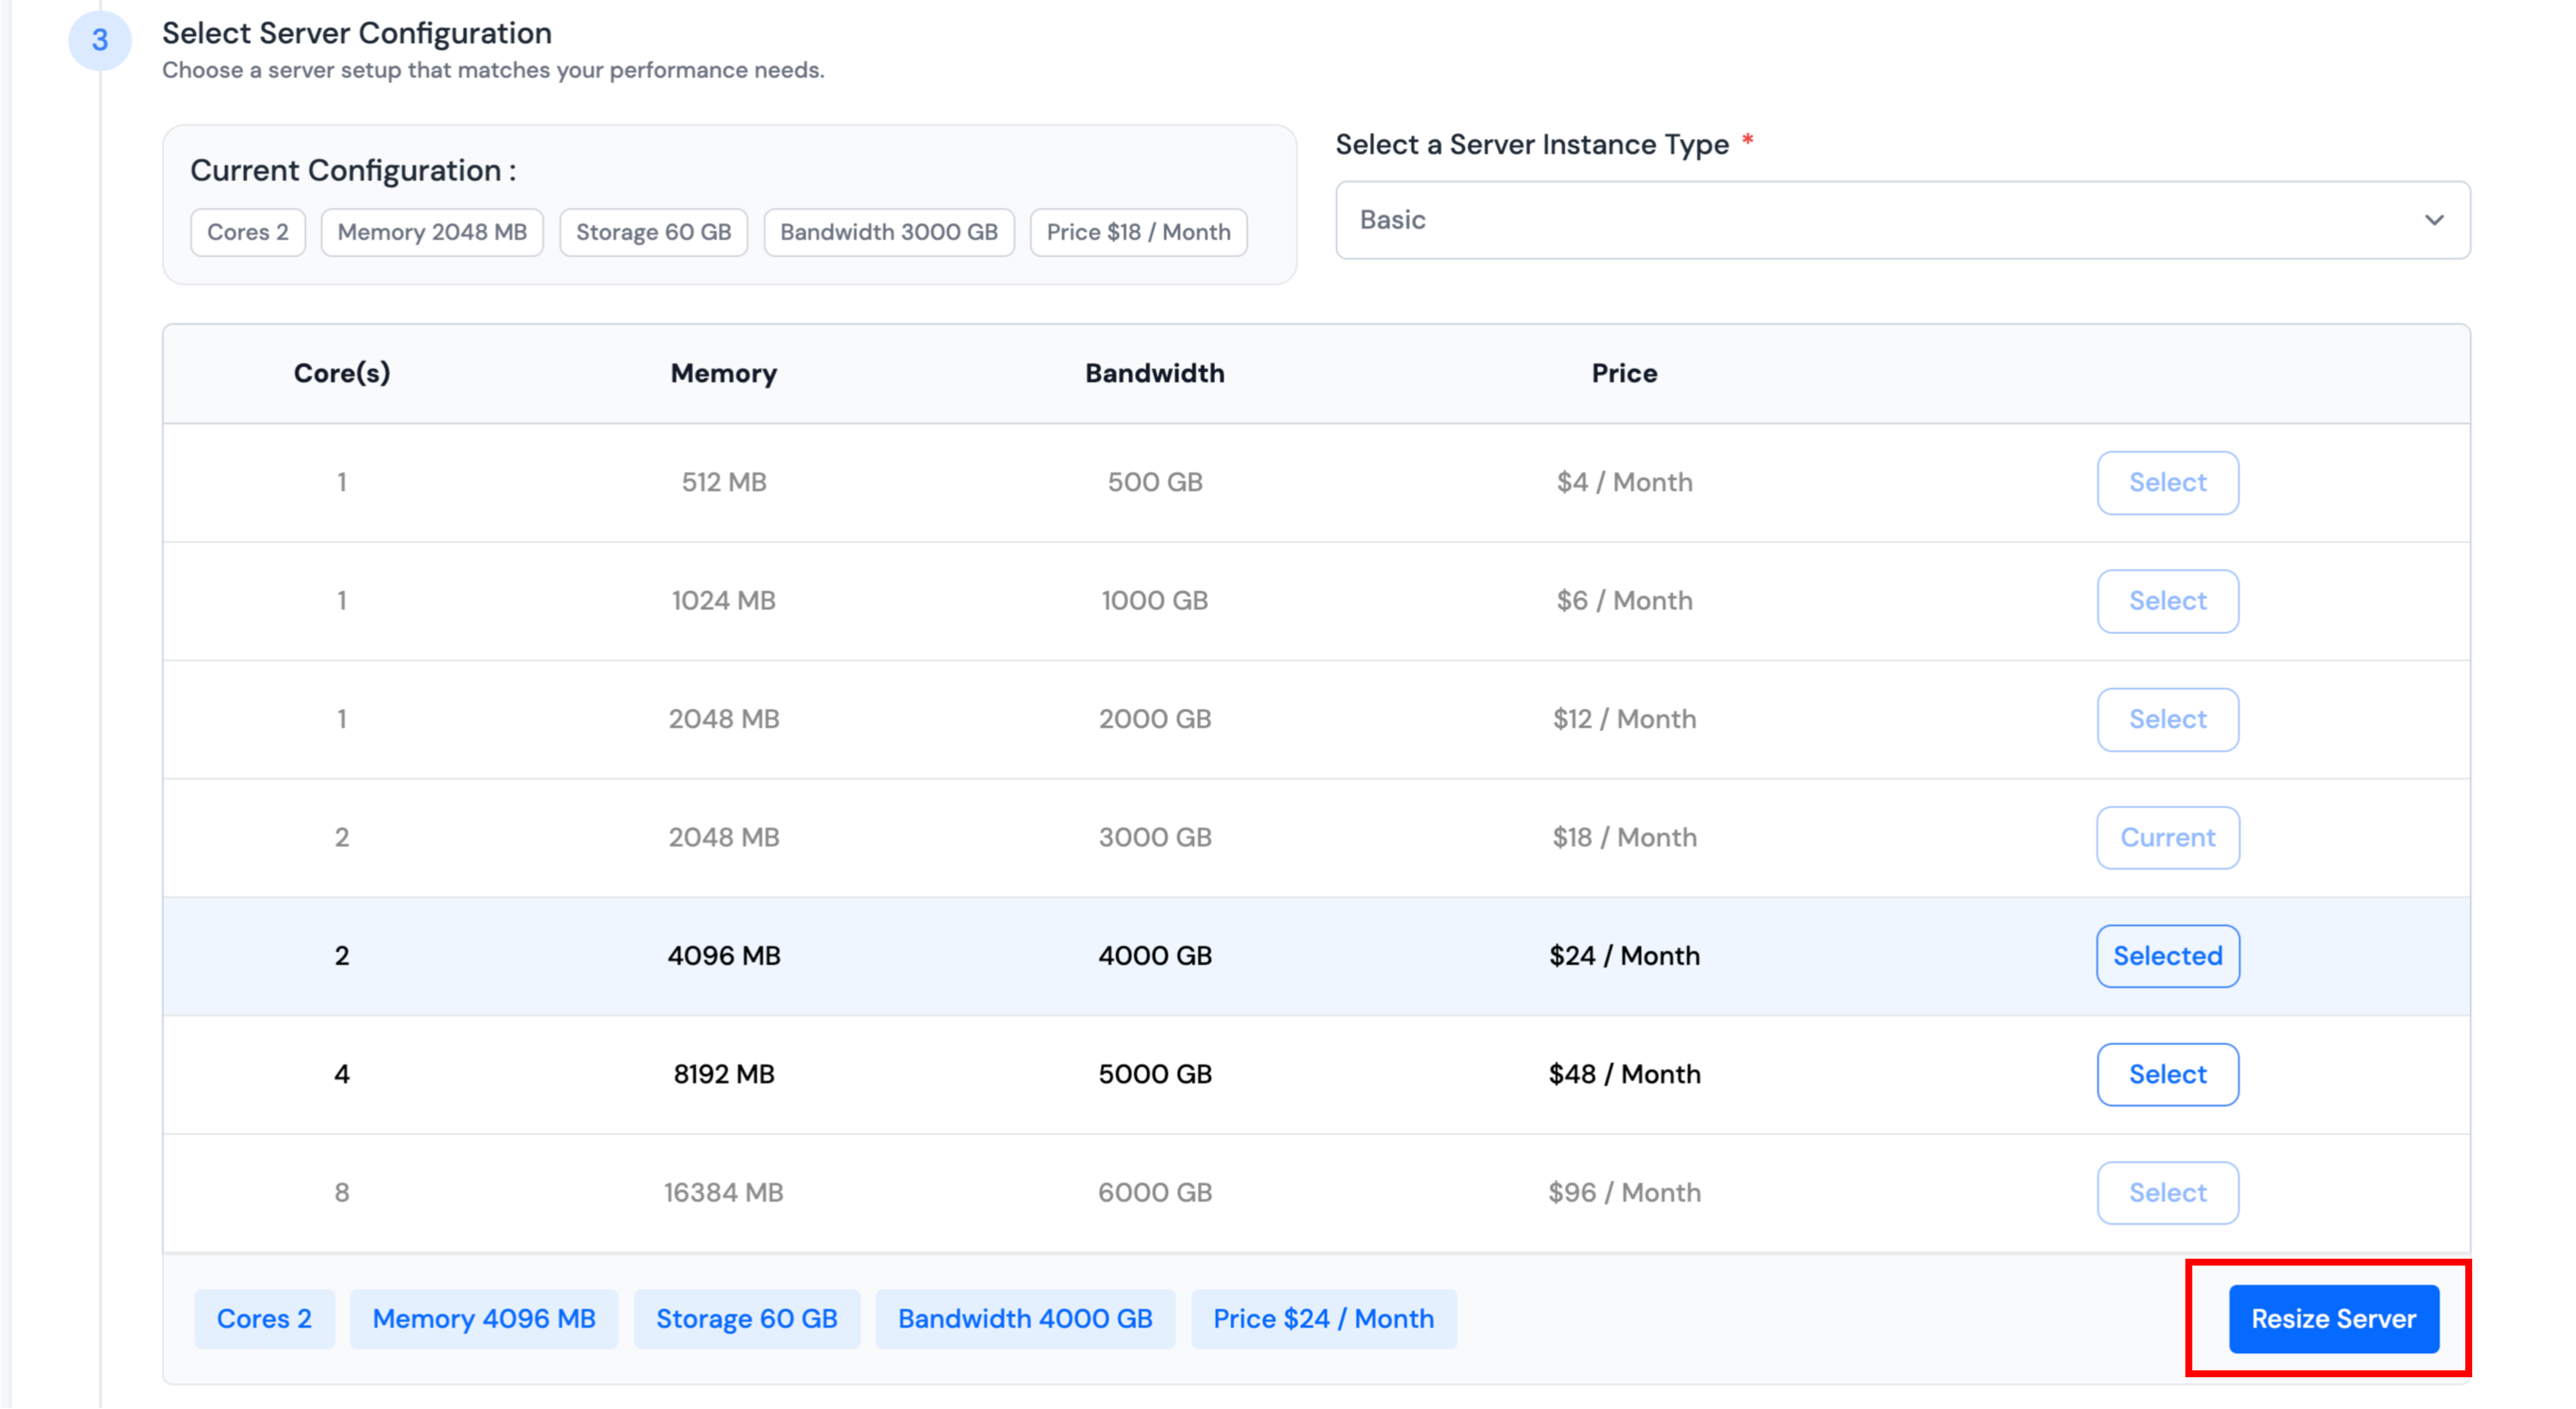
3. Choose New Configuration
Pick a new plan based on your desired specs — CPU, memory, bandwidth, and price.
Then click Resize Server.
4. Turn On the Server
After the resize is complete, turn the server back on to resume operation.

Resizing Vultr Server
For Vultr, the process is simpler and doesn’t require turning the server off or selecting resize type:
1. Select Location and Plan
On the resize screen:
- Choose your new server plan from the available list.
- There is no need to turn off the server or select resize type.
2. Click "Resize Server"
Once the plan is selected, click Resize Server to apply changes immediately.

Notes
- Disk upgrades are permanent; you cannot reduce disk size after resizing.
- Downgrading CPU/RAM may not be supported by some providers.
- Resizing usually takes a few minutes to apply.