Vultr
Vultr is a prominent cloud infrastructure provider renowned for its high-performance and developer-friendly services. Vultr is known for its simplicity, flexibility, and high-performance solutions.
Here is the step-by-step process to connect Vultr with ServerAvatar:
Step 1: Log in to your ServerAvatar account and click the Create → Server button at the top-right corner of the dashboard.

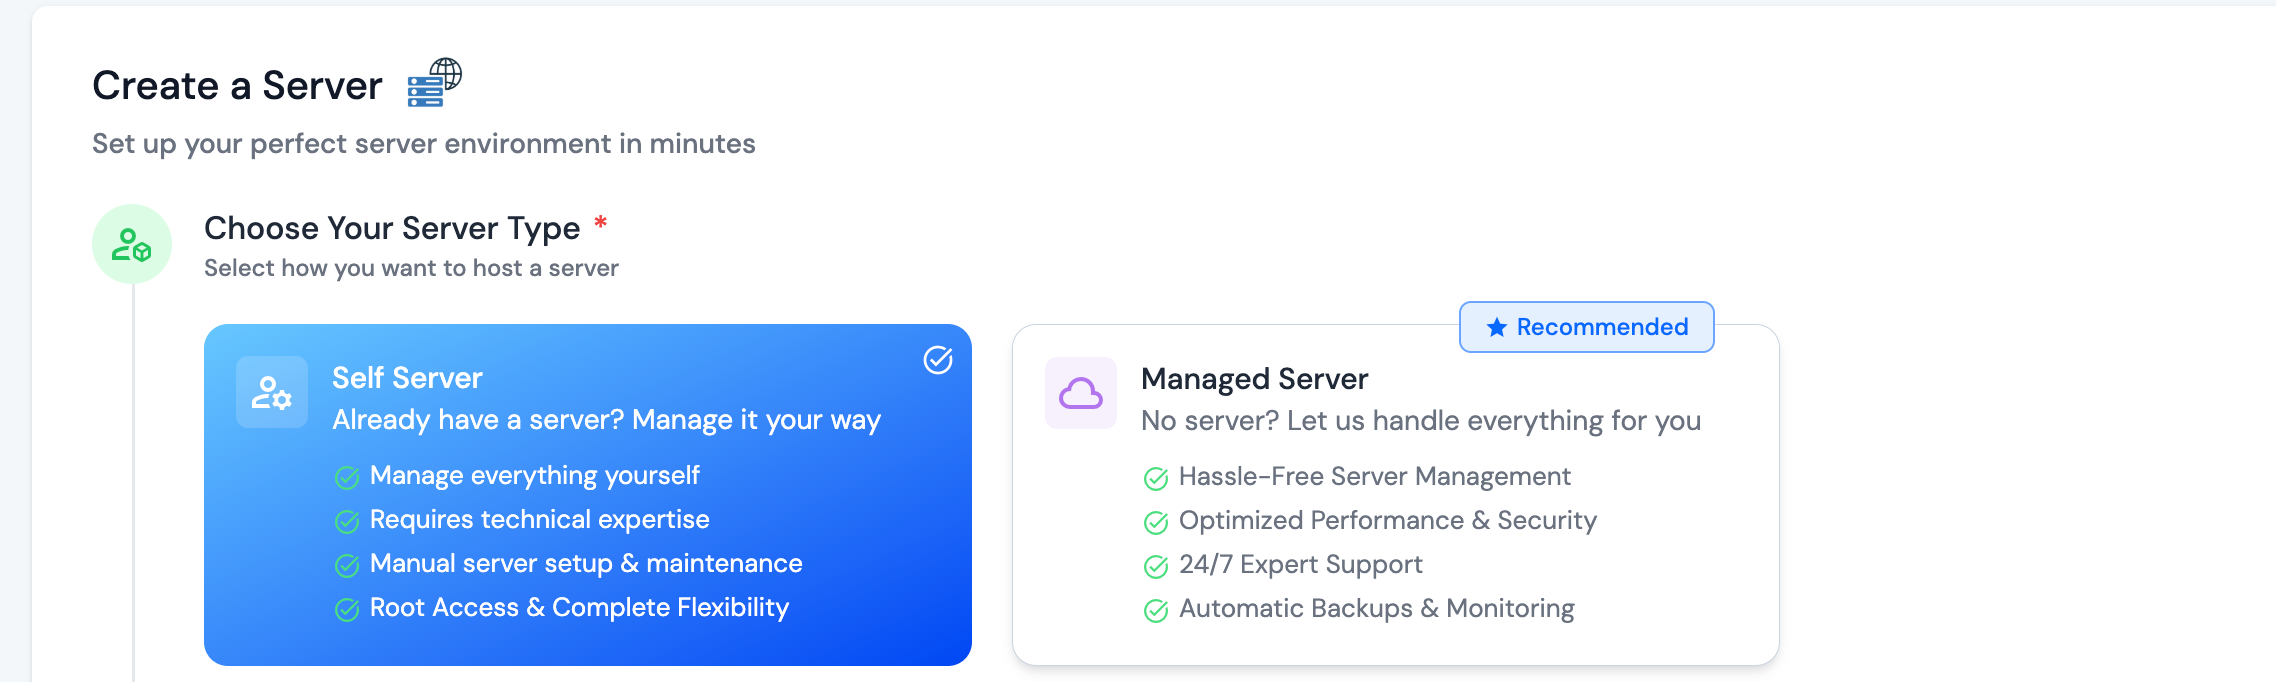
Step 2: Select Self Server as the server type.
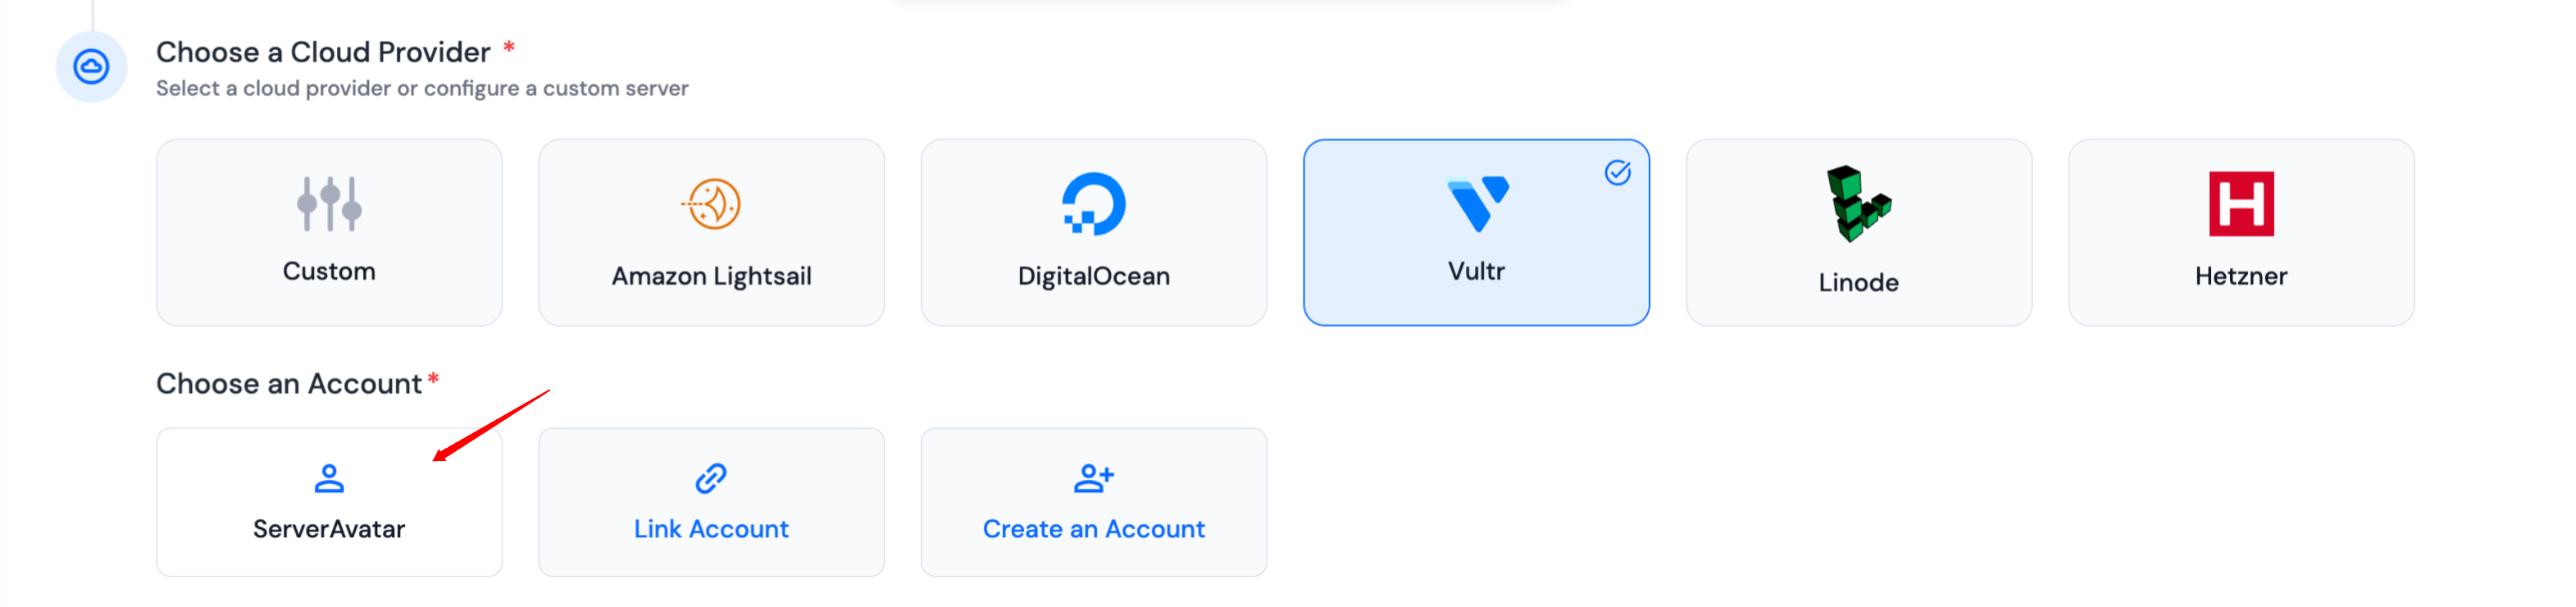
ServerAvatar provides below options of create an account on Vultr or to link an account if you already have an account.
-
Connect Existing Vultr Account: If your Vultr account is already linked to your system, you'll find it listed in the options. Simply select your account from the provided list, as shown in the below given image.
-
Link Vultr Account: If you already have a Vultr account but haven't linked it yet, use the below provided link to connect your Vultr account with ServerAvatar.
- Create a New Vultr Account: For new users without an existing Vultr account, click on the "Create an account" option. This will redirect you to the Vultr signup page. Once your account is set up, you can proceed to connect your Vultr account with ServerAvatar.
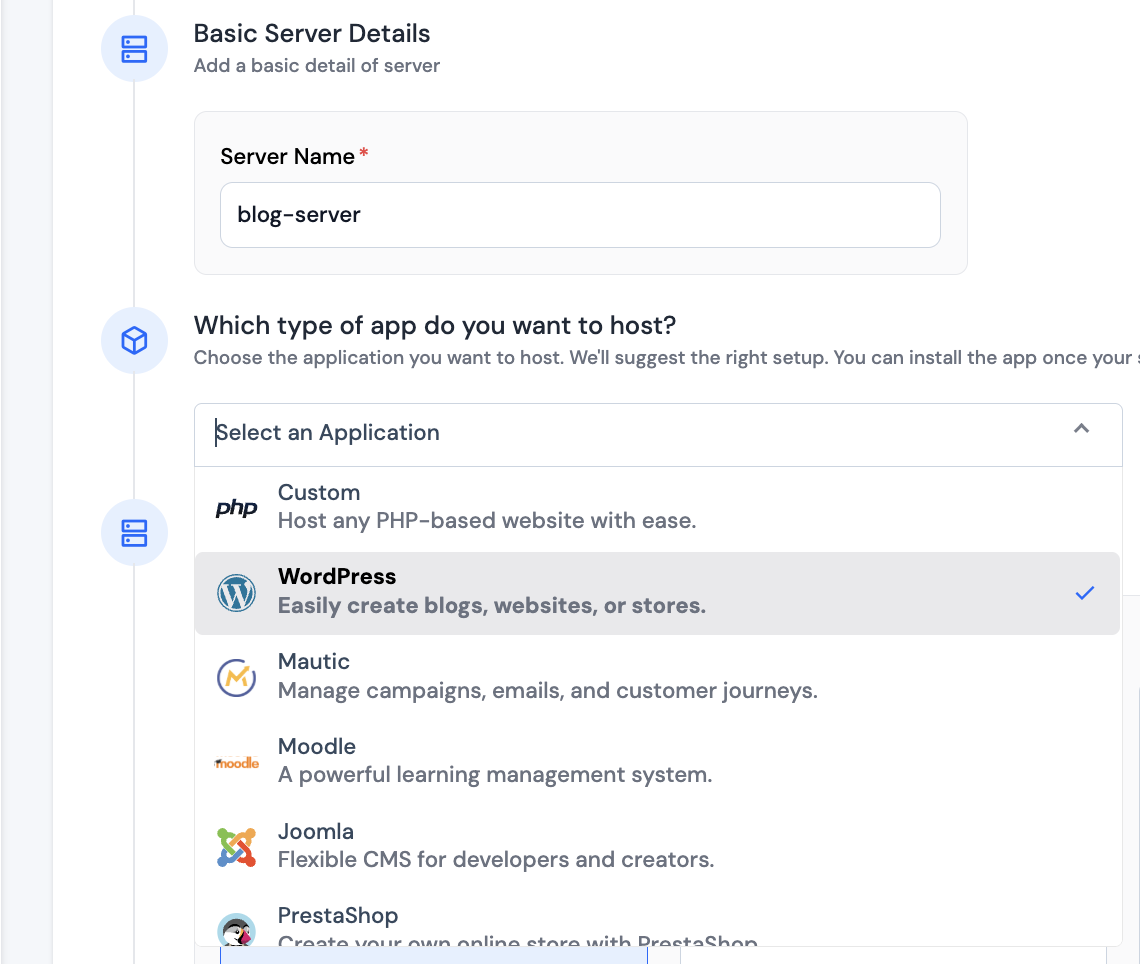
Step 3: Once you’ve selected your Vultr account, enter a Server Name of your choice.
Step 4: Select the Application Framework you intend to host. Based on your selection, ServerAvatar will recommend the appropriate setup.
Note: This field is optional.
Step 5: Pick your desired Tech Stack, Operating System Image, and Database.
When selecting your tech stack, consider the specific requirements of your project. If you choose the Node Stack, please note that MySQL and MariaDB are not compatible with this stack.
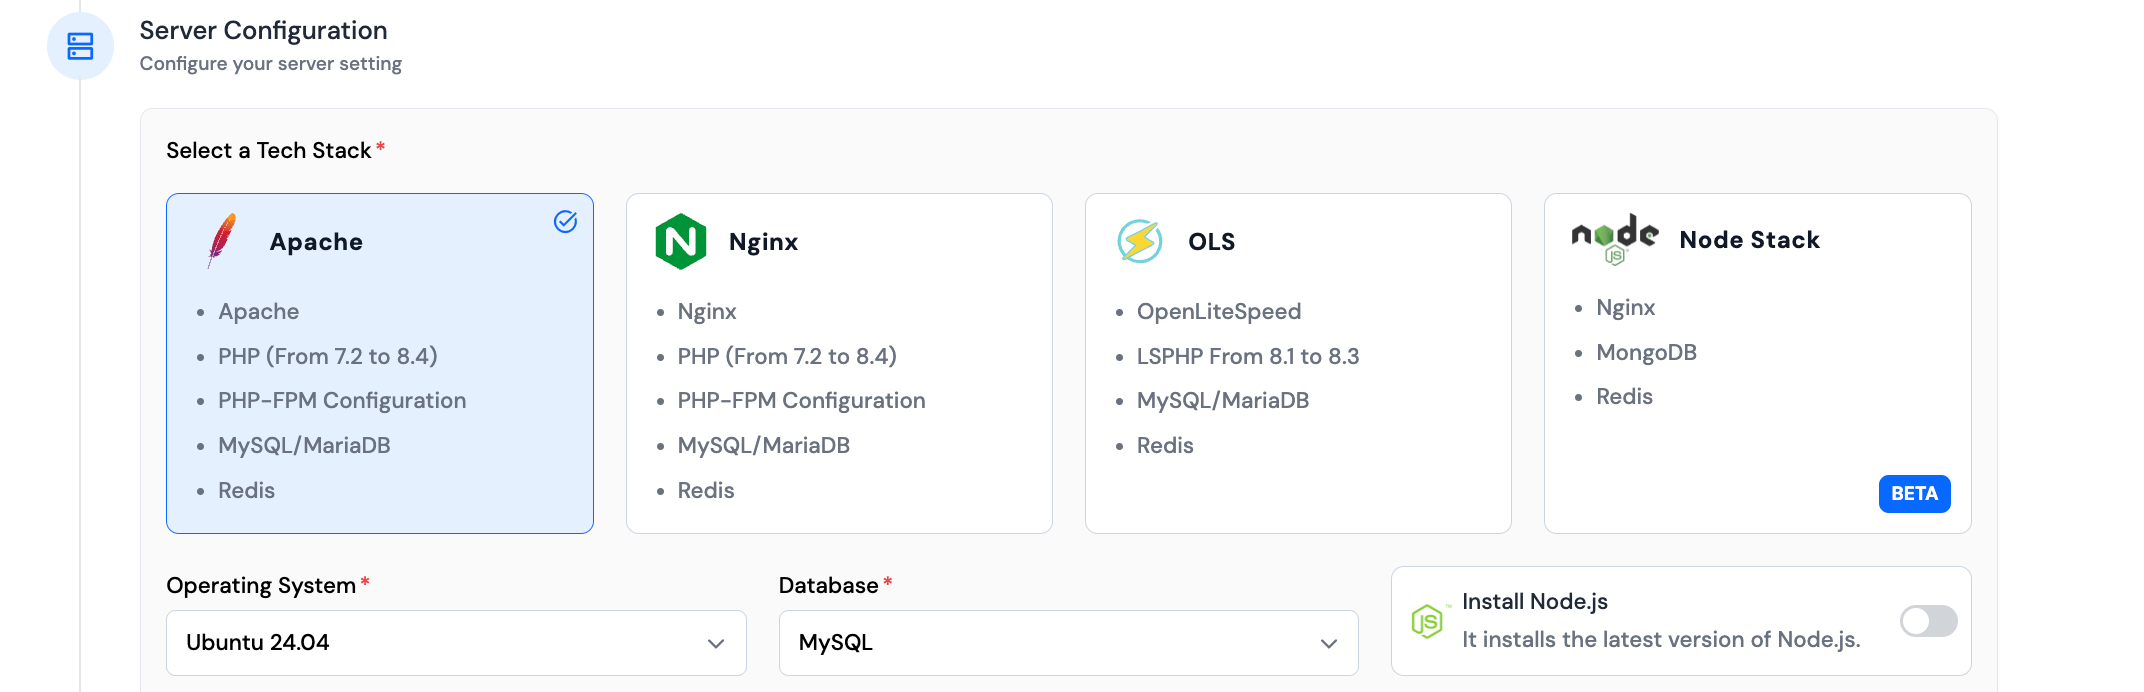
If you need Node.js, enable the corresponding toggle.
If you select the Node Stack, the Node.js toggle will not be visible as it is already included.
You can also enable Yarn installation by toggling the Install Yarn Along with Node option, if you select Node Stack as your web server.

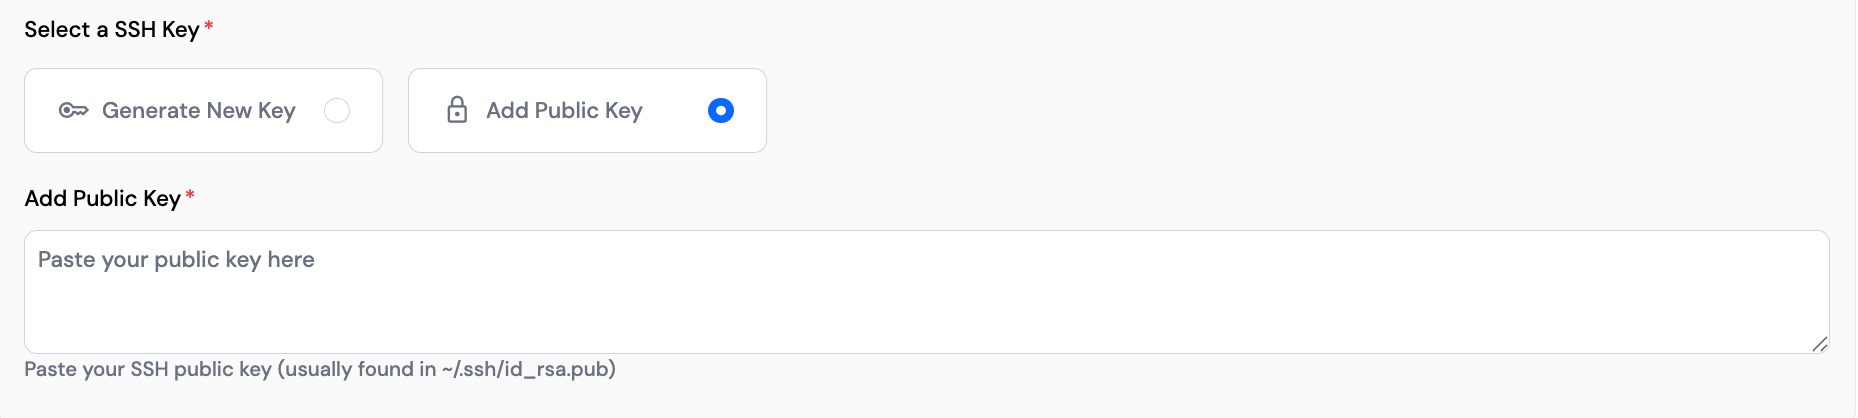
Step 6: Choose an SSH Key:
- Generate a new key: This will create a new private-public key pair for secure access.
- Add a public key: If you already have an SSH key, you can add the public key to the server to use your existing key.
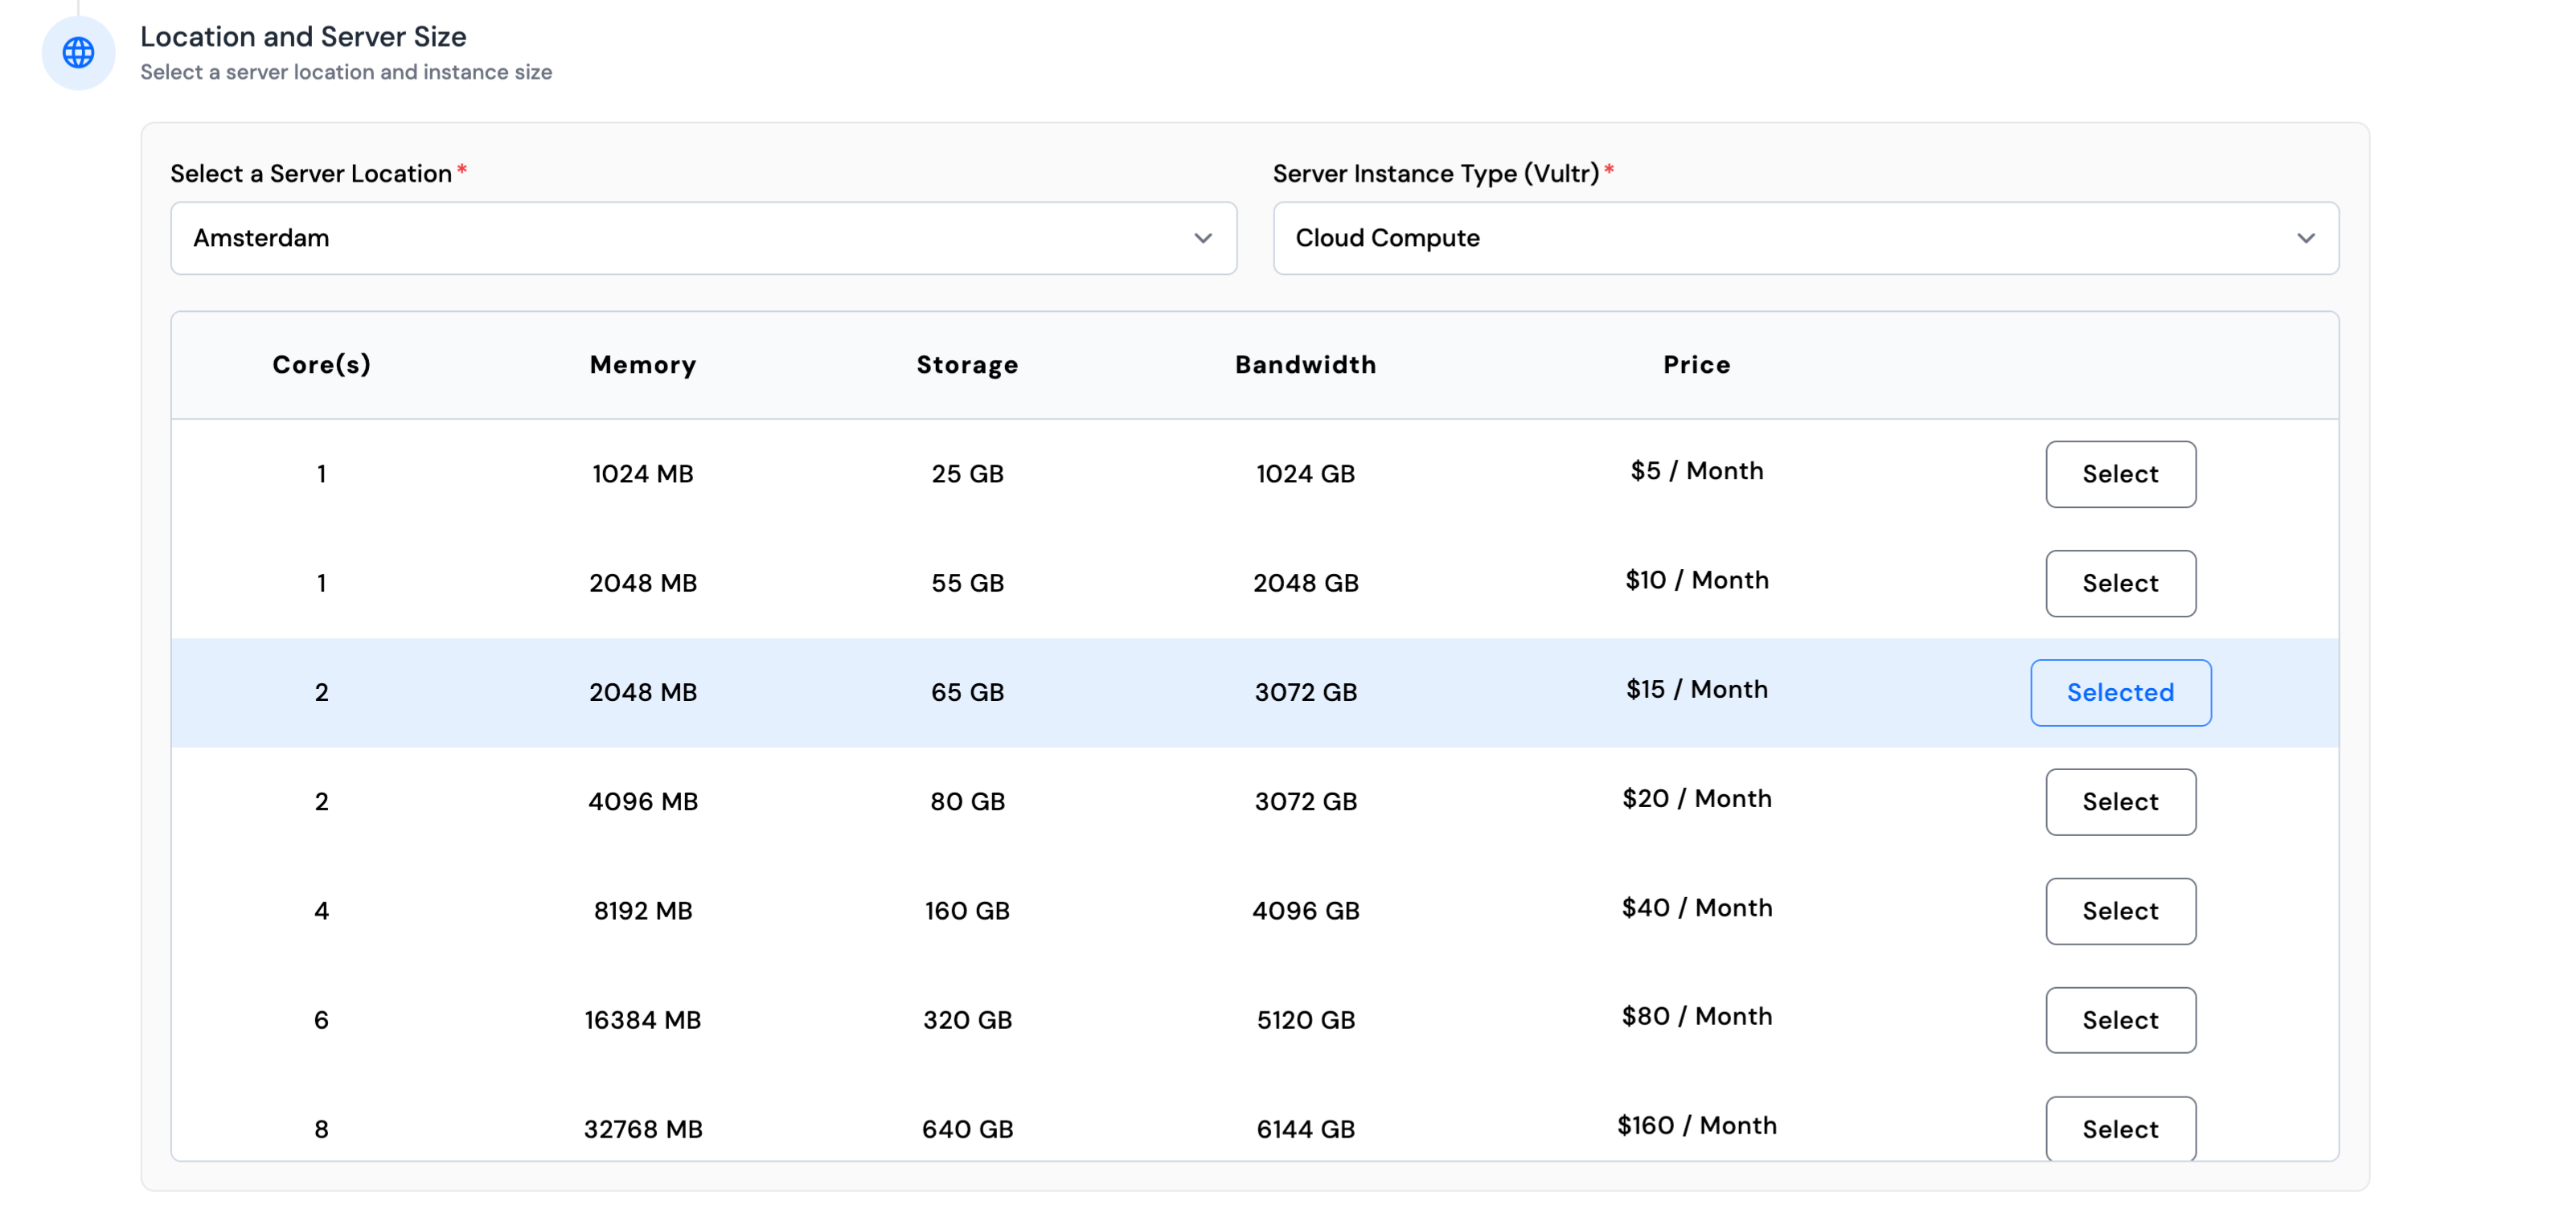
Step 7: Select a Server Location and Size.
Pick a Server Location (region) based on where your target users are located. Then choose the appropriate Server Size based on your required CPU, RAM, storage, bandwidth, and cost.
Step 8: Click the Deploy Server button to begin the setup.

Installation Process
During installation, you will see which services are being installed and configured in real-time. ServerAvatar will perform the following steps:
- Install a web server (Apache, Nginx, or OpenLiteSpeed)
- Install PHP and all supported versions (from 7.2 to 8.3)
- Install and configure PHP-FPM
- Install and configure MySQL
- Install and configure Redis
- Create a SWAP memory file
- Create basic virtual host files
- Install Git and Composer
- Finalize the setup and perform testing
The entire installation typically takes 5 to 15 minutes. Once complete, your server will be fully configured and ready to host PHP/WordPress sites directly from the ServerAvatar panel. This is how you can connect an Vultr server with ServerAvatar.